Getting Started
A few setup steps stand between you and your first model call:
- Sign up for (or log into) your Watt Cloud account
- Pick a model and look over its API call examples
- Create an API Key
- Point your requests at the base URL: https://api.watt-cloud.com/v1
- Pick one of the three API formats:
- OpenAI Chat Completions (
/chat/completions) - OpenAI Responses (
/responses) - Anthropic Messages (
/messages)
- OpenAI Chat Completions (
- Call the Model API. Copy the model name from the Watt Cloud website, or grab it straight from the model list below
- Head to Usage to review your model usage statistics
Watt Cloud Model Library
Grouped by input and output modality. Data comes from the Watt Cloud Model Library. Last updated: 2026-09-15
Text Generation (Text → Text)

| No. | Model Name |
|---|---|
| 1 | GLM-5.3 |
| 2 | DeepSeek-V4-Flash-0731 |
| 3 | Hy4 |
| 4 | GLM-5.2 |
| 5 | GLM-5.1 |
| 6 | DeepSeek-V4-Pro |
| 7 | DeepSeek-V4-Flash |
| 8 | Qwen3-Next-80B-A3B-Instruct |
| 9 | Qwen3-Next-80B-A3B-Thinking |
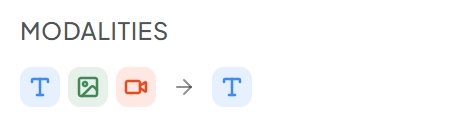
Image & Video Understanding (Image / Video / Text → Text)
| No. | Model Name |
|---|---|
| 1 | GLM-5.3-Flash |
| 2 | Kimi-K3 |
| 3 | MiniMax-M3 |
| 4 | Kimi-K2.7-Code |
| 5 | Kimi-K2.5 |
| 6 | Qwen3.5-397B-A17B |
| 7 | Qwen3.5-122B-A10B |
| 8 | Qwen3.5-27B |
| 9 | Qwen3.5-35B-A3B |
| 10 | Qwen3-VL-235B-A22B-Instruct |
| 11 | Qwen3-VL-235B-A22B-Thinking |
20 models in total: 9 are text-only, and 11 have multimodal understanding.
1. Sign Up and Log In
Head to the Watt Cloud website and use the "Login" button in the upper-right corner. Sign in with either your account credentials or a verification code, and follow the prompts. Once the login succeeds, you're taken straight to the Model Marketplace.
Figure 1: The Model Marketplace as it appears right after login
2. Pick a Model and Review Its Examples
Browse what's on offer in the Model Marketplace. A model card typically shows the model name, pricing, and core capabilities at a glance. Open any card for the full picture: the model description, its capabilities, pricing, and API call examples.
- Model Name: This is the value that goes into the
modelfield of every API call (e.g.,DeepSeek-V4-Pro) - Model Capabilities: Confirm whether the model handles text, images, tool calling, deep thinking, and so on
- Pricing: Billing is based on tokens — input, cached, and output, among others
3. Create Your API Key
Open API KEY from the top navigation bar; that's where API Keys are managed. With no API Keys on the account yet, the list is empty. Hit the Create API KEY button at the top right and a new key will be generated.
The "Create API KEY" dialog asks for a Name (e.g., "My API Key") — the name's only job is to tell your keys apart. Confirm with OK and the key is created; you'll then see its name, key ID, creation time, and so on. Copy the key value itself, since that's what your API calls will use.
Already have a key? Skip this step — just pick the existing one on the model details page when testing.
4. Base URL
Every API request goes to this base URL:
https://api.watt-cloud.com/v1
Plug it into your SDK as base_url, or use it as the prefix when calling the endpoints directly.
5. Pick an API Format
Three API formats are available on Watt Cloud; go with whichever suits your application best.
- OpenAI Chat Completions (
/chat/completions) — Recommended — follows the OpenAI Chat Completions format. - Anthropic Messages (
/messages) — follows the Anthropic Messages format. - OpenAI Responses (
/responses) — follows the OpenAI Responses format.
6. Make a Model API Call
From the dropdown menu on the model details page, choose the API Key you just created.
Scroll to the bottom of the page for a ready-made curl example; it looks like this:
curl --request POST \
  --url https://api.watt-cloud.com/v1/chat/completions \
  --header 'Authorization: Bearer ${API_KEY}' \
  --header 'Content-Type: application/json' \
  --data '{
    "model": "${MODEL_NAME}",
    "messages": [
      {
        "role": "user",
        "content": "Please give a travel plan"
      }
    ],
    "stream": true,
    "max_tokens": 512,
    "stream_options": {
      "include_usage": true
    },
    "chat_template_kwargs": {
      "thinking": true
    },
    "tools": [
      {
        "type": "function",
        "function": {
          "name": "web_search",
          "description": "Web search tool",
          "parameters": {
            "type": "object",
            "properties": {
              "query": {
                "type": "string",
                "description": "Sub-task query for text retrieval"
              },
              "timeliness": {
                "type": "integer",
                "description": "Timeline parameter setting"
              }
            }
          }
        }
      }
    ]
  }'
Once the request goes out, the model's response comes back.
Integrating programmatically? Example code is available in Python, JavaScript, Golang, and more.
7. Check Your Model Usage Statistics
The Usage Statistics page holds usage and performance data for each of the models.